- FSN Mag
- Family Meal Plans
- A beginner's meal prep plan for family weeknight dinners
A beginner's meal prep plan for family weeknight dinners
Start meal prep for beginners with a simple plan for family weeknight dinners that gets food cooked ahead of time and stored safely in the fridge.
Written for you by Forrest Yewell
6 quiet minutes to read
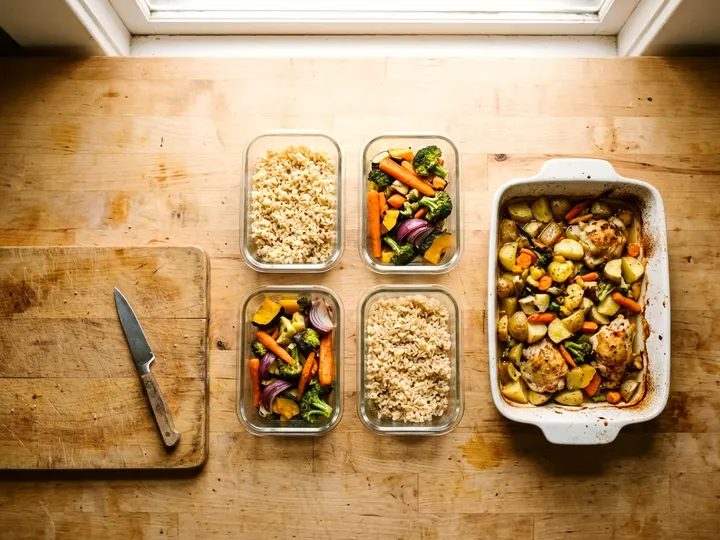
Meal prep for beginners starts with cooking parts of three weeknight dinners on a Sunday afternoon. You chop vegetables, cook meat and boil rice ahead of time, then cool the food and stack the containers in the refrigerator. Your family gets a warm meal on a busy Tuesday without the usual stress.
Pick three weeknight dinners, not twenty
Do not try to plan twenty meals at once. A full month of cooking will burn you out on the first weekend. Pick three dinners your family already eats. Three prepared meals get you through the busiest nights of the week, and Thursday and Friday can be leftovers or a quick sandwich.
Start with meals that hold up well in a cold container. Chili, spaghetti sauce and roasted chicken work well. Tacos are easy to pull apart. You can brown the ground beef and grate the cheese on Sunday, so you just heat the meat and set out the shells on Wednesday.
Think about how the food reheats, since dense casseroles take longer in the microwave than loose rice and beans. If your kids refuse unfamiliar foods, do not force them into a meal prep experiment, but try adapting your everyday menu instead. Save the complex recipes for a quiet weekend when you have more time to cook.
Shop once from a list
Write down every ingredient you need for those three dinners. Check your pantry and cross off the items you already have. Then take that list to the store and buy exactly what remains. A single trip saves you from running out for a missing onion on Tuesday night and stops you from wandering the aisles and buying snacks you do not need.
Group your list by the store layout, putting produce together, meat together and dairy together. You will get out of the store much faster. Buy sturdy storage tubs if you do not own enough. Glass or heavy plastic tubs with tight lids work best.
Pick a day to shop that gives you time to cook the next day. Some parents shop on Saturday and cook on Sunday. If you need help organizing this step, you can write a grocery list and plan the dinners in half an hour. A solid plan cuts food waste and saves money at the register.
Cook a protein, a grain and a vegetable
Treat each dinner as three building blocks. You need a protein, a grain and a vegetable. You can bake chicken breasts on a sheet pan, boil a large pot of rice, and chop broccoli and carrots to roast in the oven.
Cook the foods that take the longest time first. Start the rice or potatoes on the stove, then put the chicken or beef in the oven. While those cook, wash and cut the vegetables. You want all three components to finish around the same time, which keeps your kitchen counter clear and makes washing dishes easier.
Keep the flavors basic on your first try with salt, pepper and olive oil, which work on almost everything. You can always add barbecue sauce or a separate dressing when you serve the food later in the week. Simple spices also let you mix and match leftover components. Extra chicken from Monday can go on top of Tuesday's rice.
Cool food in shallow containers
Cooked food must cool down before it sits in the refrigerator for days, so you want the heat to escape quickly. The Purdue Extension says to use containers 3 inches tall or less when refrigerating or freezing so food cools faster. A deep bowl traps the heat in the middle of the food. Spread a big batch of soup or chili across a few flat glass or plastic tubs.
Air needs room to move around the food. Do not stack five hot containers on top of each other right away. Space them out on the counter for a short time until the steam stops rising.
Do not leave the containers out all afternoon. The Centers for Disease Control and Prevention says to refrigerate perishable food within 2 hours, or within 1 hour if it is above 90 degrees F. Wait just until the food stops steaming, then put the lids on and slide the tubs onto the refrigerator shelves. Leaving food out too long invites bacteria to grow.
Label and date everything
Cooked chicken looks like cooked pork through a frosted plastic lid, and you will forget what you cooked and when you cooked it. Stick a piece of masking tape on every container. Write the name of the food and the date you cooked it with a permanent marker. This stops you from guessing if a tub of pasta is two days old or two weeks old.
Put the containers you will eat first near the front of the refrigerator. Push the meals for later in the week toward the back. This stops a hungry kid or a tired partner from eating Thursday's dinner on Monday afternoon.
Keep the labels simple. A marker and tape cost very little and take seconds to apply. Peel the tape off before you wash the tubs so it does not clog your dishwasher.
Fridge and freezer times for cooked food
Your refrigerator and freezer must stay cold enough to keep the cooked food safe. The Centers for Disease Control and Prevention says to keep the refrigerator at 40 degrees F or below and the freezer at 0 degrees F or below. You can check these temperatures with an inexpensive appliance thermometer. Just set the dial inside your refrigerator to a colder setting if the number climbs too high.
Cooked food does not last forever in the cold. The Purdue Extension says not to keep leftovers in the refrigerator longer than 3 to 4 days and to freeze any you will not eat within that time. Freezing keeps food longer and saves it from the trash. If you know Thursday's dinner will wait five days, put it straight into the freezer on Sunday.
Use a simple chart to track how long your prepped food lasts. The Purdue Extension notes that cooked meat, soups, stews and cooked poultry keep about 2 to 3 months in a freezer at 0 degrees F or below.
Food type | Refrigerator time | Freezer time at 0 degrees F or below |
|---|---|---|
Leftovers | 3 to 4 days | Freeze any you will not eat within that time |
Cooked meat | 3 to 4 days | About 2 to 3 months |
Soups and stews | 3 to 4 days | About 2 to 3 months |
Cooked poultry | 3 to 4 days | About 2 to 3 months |
When you freeze food, leave a small gap at the top of the container. Food expands as it turns to ice. That little space stops the plastic lid from popping off in the cold drawer.
Reheat to 165 degrees F
A weeknight dinner is only helpful if you heat it up safely. Pull the containers from the refrigerator and scoop the food onto a microwave-safe plate or into a pot. The Centers for Disease Control and Prevention says leftovers and casseroles should reach 165 degrees F. You can push a food thermometer into the thickest part of the meat to check the temperature.
Stir the food halfway through the heating time in the microwave. Microwaves leave cold spots in the middle of a dense pile of rice or ground beef. Stirring moves the heat around and gets the whole meal up to a safe temperature.
Cover the plate with a damp paper towel while it heats. The moisture stops chicken and pork from drying out and keeps the microwave clean. If you use a pot on the stove, add a small splash of water. This helps the food warm up evenly without burning.
Once the food hits 165 degrees F, dinner is ready. You have a warm meal on the table quickly. After the kids eat, you can put those plates in the sink and try a quick family activity before bed.
More for your crew
Plan a week of family dinners and a grocery list in 30 minutes
7 quiet minutes to read